
Introduction:
Performing regular oil changes is essential for maintaining your car’s engine health and performance. Not only does it prolong the life of your vehicle, but it also saves you money in the long run by preventing costly repairs. In this comprehensive DIY oil change guide, we’ll walk you through the process step by step, from gathering the necessary tools to disposing of the old oil responsibly. By the end of this article, you’ll feel confident enough to tackle this essential maintenance task on your own, saving both time and money.
1. Importance of Regular Oil Changes
Regular oil changes are crucial for the longevity and performance of your vehicle’s engine. Engine oil lubricates the moving parts, reduces friction, and helps dissipate heat, preventing wear and tear.
1.1 Engine Lubrication
Engine oil creates a protective barrier between metal components, reducing friction and minimizing wear and tear on the engine.
1.2 Heat Dissipation
Oil helps to dissipate heat generated during engine operation, preventing overheating and potential damage to components.
2. Frequency of Oil Changes
The frequency of oil changes depends on several factors, including the type of oil used, driving conditions, and manufacturer recommendations.
2.1 Synthetic vs. Conventional Oil
Synthetic oil typically lasts longer than conventional oil and provides better protection against engine wear, allowing for extended oil change intervals.
2.2 Manufacturer Recommendations
Refer to your vehicle’s owner’s manual for specific recommendations regarding oil change intervals. Manufacturers often provide guidelines based on mileage or time intervals.
3. Tools and Materials Needed
Before you begin, gather the necessary tools and materials for the oil change process. Having everything on hand will streamline the process and ensure a successful outcome.
3.1 Tools
- Socket wrench set
- Oil filter wrench
- Oil drain pan
- Funnel
- Jack and jack stands (if required)
3.2 Materials
- Engine oil (appropriate viscosity and type)
- Oil filter
- Disposable gloves
- Shop towels or rags
- Oil filter gasket (if required)

4. Step-by-Step Guide to DIY Oil Change
Now that you have everything you need let’s dive into the step-by-step process of performing a DIY oil change.
4.1 Prepare Your Vehicle
Park your car on a level surface and allow the engine to cool down slightly before beginning the oil change process.
4.2 Locate the Oil Drain Plug
Locate the oil drain plug underneath the vehicle. Use a socket wrench to loosen the plug and position the oil drain pan beneath it to catch the old oil.
4.3 Drain the Old Oil
Carefully remove the drain plug and allow the old oil to drain completely into the oil drain pan. Once drained, replace the drain plug and tighten it securely. (DIY Oil Change Guide: Save Money and Maintain Your Car Like a Pro)
4.4 Replace the Oil Filter
Locate the oil filter and use an oil filter wrench to remove it. Be prepared for some oil spillage and have a rag handy to clean up any mess.
4.5 Install the New Oil Filter
Before installing the new oil filter, apply a thin layer of clean oil to the rubber gasket to ensure a proper seal. Screw the new filter into place by hand, then tighten it according to the manufacturer’s specifications.
4.6 Add New Oil
Using a funnel, pour the appropriate amount and type of oil into the engine. Refer to your owner’s manual for the correct oil viscosity and capacity.
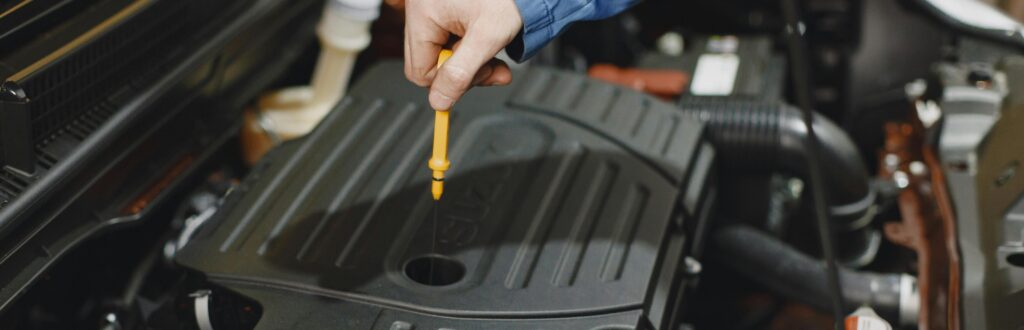
4.7 Check Oil Level
Once you’ve added the new oil, start the engine and let it run for a few minutes. Turn off the engine and allow it to sit for a moment before checking the oil level using the dipstick. Add more oil if necessary.
5. Disposal of Old Oil
Properly disposing of old oil is essential for environmental conservation. Never dump used oil down the drain or onto the ground.
5.1 Recycling Centers

Many auto parts stores and recycling centers accept used motor oil for recycling. Pour the old oil into a clean, sealable container and take it to a recycling facility for proper disposal.
5.2 Local Regulations
Be aware of local regulations regarding the disposal of used motor oil. Some areas have specific guidelines for recycling and disposal.
6. Benefits of DIY Oil Changes
Performing DIY oil changes offers numerous benefits beyond cost savings, including:
6.1 Cost Savings
DIY oil changes are significantly cheaper than visiting a mechanic or dealership for the same service.
6.2 Convenience
You can perform an oil change at your convenience, without having to schedule an appointment or wait in line at a service center.
6.3 Sense of Accomplishment
Completing a DIY oil change successfully gives you a sense of accomplishment and empowers you to take control of your vehicle’s maintenance.
FAQs (Frequently Asked Questions)
Here are some common questions about DIY oil changes:
- How often should I change my car’s oil?
- What type of oil should I use for my vehicle?
- Do I need to replace the oil filter every time I change the oil?
- Can I reuse the oil drain plug gasket?
- Is it necessary to jack up the car to change the oil?
- How do I dispose of old oil responsibly?
Conclusion
Performing a DIY oil change is a straightforward task that can save you time and money while promoting the longevity of your vehicle’s engine. By following the steps outlined in this guide and adhering to proper disposal practices, you can maintain your car like a pro and enjoy a smoother, more efficient driving experience for years to come.
Read more about HOW TO CHOOSE THE RIGHT CAR: A COMPREHENSIVE GUIDE